
FAQ / Help pages - General Information
What is Glitterboo?
Glitterboo is an image editing application which lets you add sparkles and other effects (hearts, snowflakes, flowers, different shapes & icons etc.) to your photos or graphics.
Glitterboo performs some calculations on your uploaded image to decide how to add effects in selected areas. You can also use the Pen selection tool to add effects in any area you choose.
You can then turn your image into an animation, and download as a video or animated GIF. Members can also upload soundtracks to go with the videos.
I don't want to read a lot of stuff, how can I quickly get started?
You can start by going to the editing page and trying a demo photo (you can also click on more demo photo pages here).
You can add effects by first using one of the selection tools (brushes) to "paint" the area you want selected, and then press the "Apply" button. The demo photos already have some areas selected as an example.
Download the results at the panel directly underneath. Choose the format (image, animation or video), image size (resolution), and press the Download button.
After a short while, you will get a link to download the image, view in a browser window, or save to Photobucket, Imgur or Dropbox. (Use the Photobucket or Imgur buttons to get a copy of the direct link to the image or animation. Photobucket button is only available when using a linked Photobucket account)
You can upload one of your own images using the Upload box on the right, or upload from the web by pasting an image link (this may be useful if you're on a mobile Internet connection and want to use an image that's already online somewhere, since it's fast and it doesn't use any extra bandwidth).
If you are using an iPad (or iPhone), you can also take a photo directly from here.
What's the difference between the selection tools/brushes?
The default selection tool is the "Selection Marker". You can use it to select areas that will have effects added.
It's a type of intelligent selection tool - it won't add effects to blank or low-contrast parts of an image.
In other words, it will try to detect certain features in the photo and only add effects in those areas.
For example, if you have a string of lights in an otherwise dark background, the selection marker tool will try to add effects that blend in with those lights, without adding anything to the dark patches. It will try to match the position, size and color of features in your photo.
You can also change the sliders such as "Max.Size" and "Intensity" to change how the effects look (you'll need to press the Apply button to see each change).
We realised that the selection marker doesn't always work the way you want it to, even though a lot of the time it's very useful.
So we've added the "Selection Pen" tool. You can use this to select areas in a photo or graphic that should always have effects added.
It will work in any part of a photo, even completely blank/dark areas.
It won't try to match the position or size of features within your photo, however it is still influenced by the colors in your image. If there are no bright colors at the selected areas in the image, the effects will default to a white color.
This is useful for adding effects to areas of the photo that aren't detected well by the selection marker, or adding effects to totally clear areas such as sky.
It's also pretty nice for writing text using sparkles or other effects, see How do I write using Sparkle effects? for more details on how to do this.
Selection colors: When you select an area of the image for adding effects to, the area is highlighted using a different color depending on the selection tool used
Note: These colors don't appear in your final image - they're simply used to highlight selected areas. You can hide or show them by toggling the "Hide Selection" button.
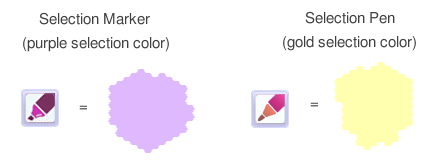
Note: You can mix and match both selection tools in the same picture.
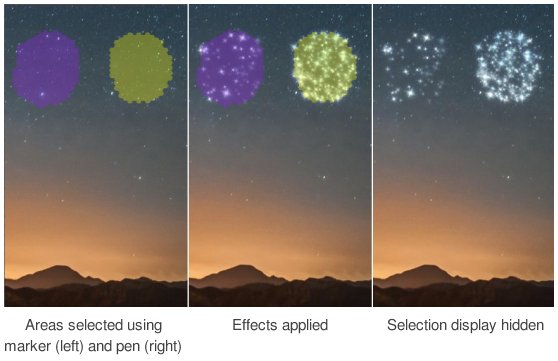
Areas selected with the selection marker appear as a purple overlay, while the selection pen areas appear as yellow/gold.
You can notice in the example above how the selection marker will only add effects to areas it has detected features in (stars in this example), while the selection pen will add effects to the whole of the selected area.
When you press "Select All" it will select everything using the selection marker.
How does the 'Orton effect' option work?
This is a special option that changes the look of the entire picture, even if there are no other effects added or areas selected.
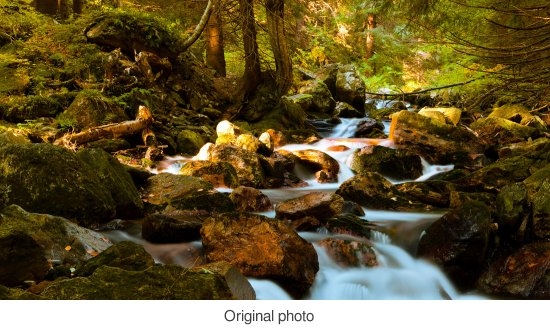
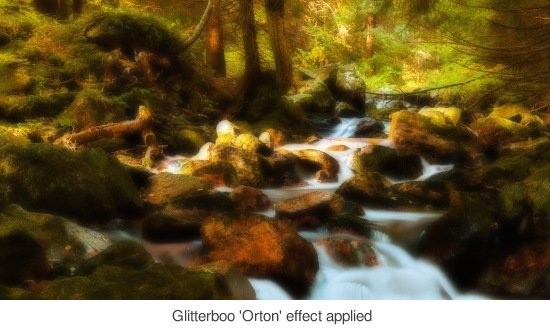
You can select from different strengths of effect; low, medium or high. This is a version of the classical photographic "Orton effect" and gives a soft, dream-like look to photos (and also graphics).
It's not quite the same as just applying a blur effect, since there is also a level of detail remaining in the photo that you wouldn't get from a simple blur.
Here's a before & after example (click each photo for hi-res version):
Note: When you change the Orton effect settings, it takes effect immediately, so any other changes or selections may also get applied at the same time.
Of course, you can simply use the Orton effect on it's own to change the mood of a photo, without necessarily adding any other effects.
Orton effect was called 'luminous effect' in previous versions of Glitterboo.
You can select from different strengths of effect; low, medium or high. This is a version of the classical photographic "Orton effect" and gives a soft, dream-like look to photos (and also graphics).
It's not quite the same as just applying a blur effect, since there is also a level of detail remaining in the photo that you wouldn't get from a simple blur.
Here's a before & after example (click each photo for hi-res version):


Note: When you change the Orton effect settings, it takes effect immediately, so any other changes or selections may also get applied at the same time.
Of course, you can simply use the Orton effect on it's own to change the mood of a photo, without necessarily adding any other effects.
Orton effect was called 'luminous effect' in previous versions of Glitterboo.
How can I add effects to my Facebook photos?
If you have the photo files that you originally used to upload to Facebook, you can upload these directly to Glitterboo as normal. This is currently the easiest method.
Otherwise, you can download a photo from Facebook.
Click on your name at the top of the Facebook screen to go to your profile, then click on Photos. Find the photo you want, click on it, and then select "Options" and "Download" at the bottom of the photo. This will save a copy of the photo that you can now use on Glitterboo.
Once you have added effects to a photo, you can post it back on to Facebook as a normal photo.
If you want animations to show, we recommend downloading using the Video option on Glitterboo.
For animated gif files, previously, Facebook would not playback these files, however they have recently started allowing this. You need to post them by copying and pasting the "direct link" image URL. You can get this by using the Imgur upload buton on Glitterboo.
We hope to make this whole process of accessing Facebook photos much easier with a future update.
How do I write using Sparkle effects?
The new Pen tool in the latest version of Glitterboo lets you write a short name or other simple text or patterns in Sparkles!
Simply choose a photo or image to use, upload it and then select the Pen tool:
We suggest changing the selection brush size to medium (or large) and using settings 4 or 5 for the "Intensity" and "Max Size" slider controls.
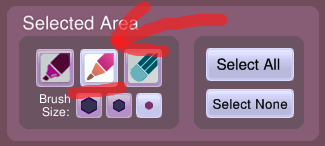
Now try writing by simply using the selection tool as a pen (see example below).
Press Apply to see how it looks like (you can also use the "Hide Selection" toggle to hide the yellow selected area highlighting.)
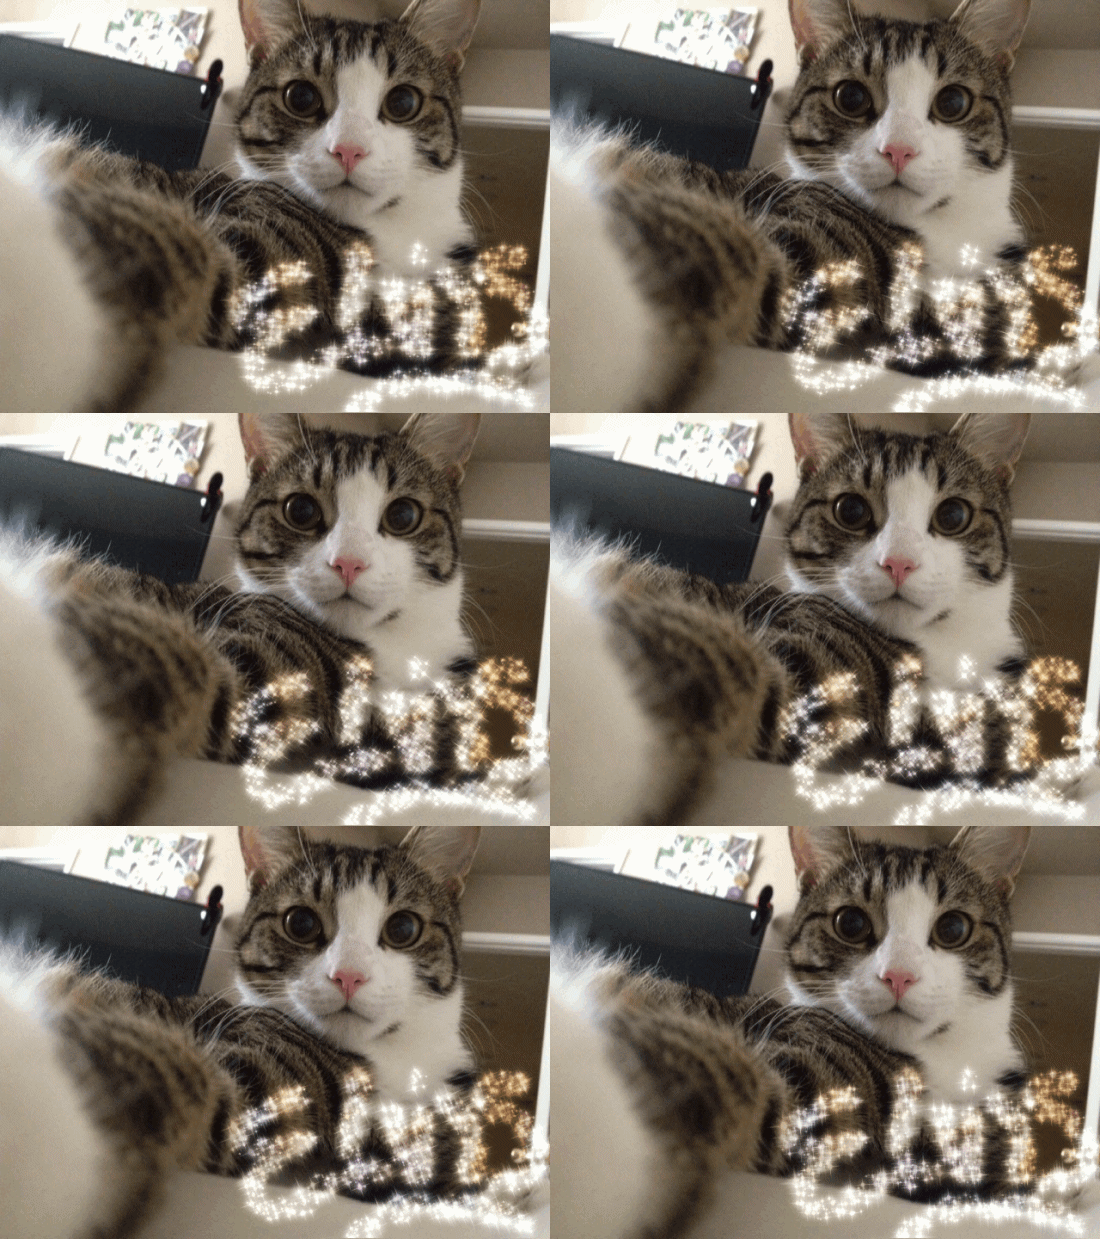
This works especially well on iPads, tablets and touchscreens - just use your finger to draw some text and press Apply.
Make sure that you're using the Pen selection tool for best results, since this tool will always add effects over the selected areas.
Change the Max.Size, Intensity and other sliders for more control over what your writing looks like.
Simply choose a photo or image to use, upload it and then select the Pen tool:
We suggest changing the selection brush size to medium (or large) and using settings 4 or 5 for the "Intensity" and "Max Size" slider controls.

Now try writing by simply using the selection tool as a pen (see example below).
Press Apply to see how it looks like (you can also use the "Hide Selection" toggle to hide the yellow selected area highlighting.)

Picture courtesy of zissou12
This works especially well on iPads, tablets and touchscreens - just use your finger to draw some text and press Apply.
Make sure that you're using the Pen selection tool for best results, since this tool will always add effects over the selected areas.
Change the Max.Size, Intensity and other sliders for more control over what your writing looks like.
How can I change the size of the Selection Pen sparkles?
When you use the Selection Pen tool, it doesn't try to figure out the size of each effect from your picture. So it just uses a mixture of random sized effects.
Currently, you can just set the "Max. Size" slider to a lower value to only have smaller sized sparkles (or other effects).
You can also use the "Intensity" slider to make effects more dispersed.
Currently, you can just set the "Max. Size" slider to a lower value to only have smaller sized sparkles (or other effects).
You can also use the "Intensity" slider to make effects more dispersed.
How do the "Resized" and "Cropped" buttons work?
For Animation and Video download sizes, you can selected between a cropped picture or a resized picture.
The crop option will let you choose a small part of the image to download, while the resize option will download the entire area of the picture.
You can choose between crop and resize for all download sizes up to 640x480 pixels. The resize option is used as default for all higher resolution download sizes.
