

How it works
Update: We've now added a selection pen which can be used to add effects anywhere in a photo or image
See the FAQ page here for general info and details of the different selection tools.
The info below is still relevant for the default "Selection Marker" tool.
Glitterboo uses details in your image to blend in effects
After you upload a picture, we scan the image looking for highlights. These are areas of the photo (or graphic) that stand out from the background. This could be lights, reflections or simply areas with a mixture of light and dark. The following image shows the simplest case with an image of bright circles against a dark background:
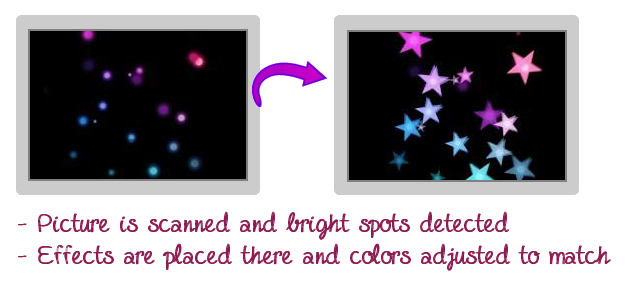
We've scanned the image and found where the brights spots are, and placed the effects there. Note that the effects will always use the same color as used in the image. This helps effects blend in to the picture better.
Most photos and graphics are not this simple though, so a better example may be part of a photo with a texture:
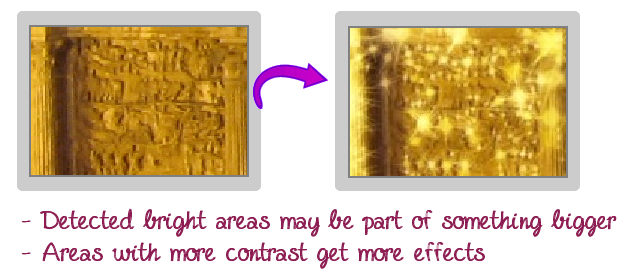
(detail from the triumphal arch of Septimius Severus in Rome)
If there are no distinctive bright, reflective areas in the photo, Glitterboo will try to find any areas where there is some contrast between lighter and darker colors.
This can be seen with the original image on the left, where there are some small bright areas as part of the texture. So these brighter areas are where the sparkling effects will be applied (image on the right).
Note: Some parts of a photo will be too "flat" to have any effects applied to them. You can use the sliders on the photo editing page to try to adjust this (by increasing "Intensity" or decreasing "Max Size"), but the effects won't be applied on areas of the photo which are completely a single color, for example.
What you can control
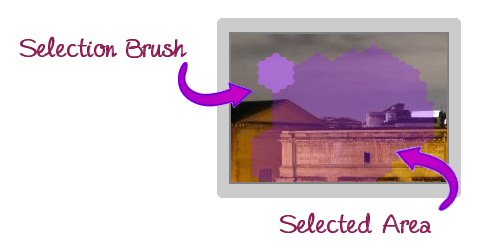
So we've shown how effects are influenced by the details in a photo. But you might find that you don't want an effect in a certain place. Use the Selection tools on the photo editing page to select and de-select relevant areas. Effects will then only be applied to areas that you've selected using the brush.
Selected areas are shown with a purple semi-transparent overlay. Visit the photo editing page for more details, and to try it out.
You can also control the maximum size, intensity and color saturation of the current selected effect. The photo editing page linked above has more details about this, and other options such as animation styles.
Need some more ideas on how it works on different photos?
Try the Choosing a photo page, or check out the photo gallery or animation gallery.
Members get access to all effect categories and larger image and animation download sizes.
Click here to see how higher resolutions are different from smaller image sizes.